 | USER MANUAL
| Fecha:
Nov 12 de 2014 |
|
Labeling Images
|
|
|
Through tab cuts can activate the option to display and edit labels on the images from the box text.
To view photos, TC and MRI:
|
|
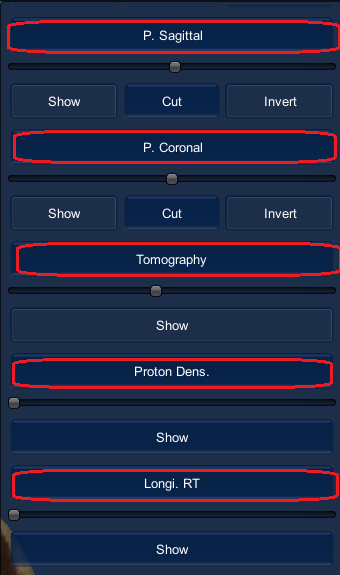
- Go to the Cuts tab.
- Click on the name of the type and orientation plane of the image.
|
|
- A window like the following appears:
|
|
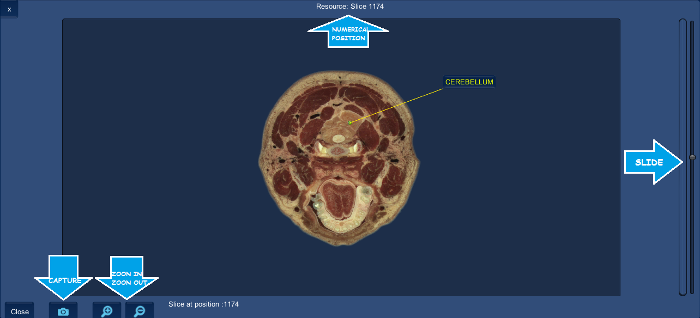
- Draggin
the mouse cursor over the image, will draw a vector fron the closest 3D
visible organ (defined in the organs´browser) to the mouse cursor and
the organ name will be displayed as in the image above.
- When the vector is green colored, it means that the
cursor is pointing the nearest body found , when the blue line
indicates that the cursor is inside the body identified
|
|
|
Add labels pins to the images
|
| First, activate the Pins editor by clicking the icon Pins |
|
-
Create, edit and delete a Pin
- To create a Pin click
 Add Pines. Add Pines. - Plave the mouse cursor into the anatominal structure you desire to name and click
- Write the name of the label, move the mouse cursor to the place you want the label appear and click.
- To edit a Pin click
 and then click the head of the pin to edit, now it is ready for rename
and re- located to the label by clicking the desired location.,
and then click the head of the pin to edit, now it is ready for rename
and re- located to the label by clicking the desired location.,
- To remove the label click
 , and click on the head of pin removed. , and click on the head of pin removed.
- To Show - Hide labels click

|
To save the image with labels created within the platform BioTk Web.
- Exit the window by clicking Close,
- Save the image with the pins created as scene.
- Open the tab “Save-Load”
- Click “Scenes”
- Make sure the text “Save Current Scene” appears above the text box.
- Enter the name and hot Enter.Abra la pestaña de Salvar- Guardar
-
To see the Image you created with pins:
- In Save Load Tab.
- Load the scene that contains the image labeled
- Open the Cuts Tab
- Select the Image and orientation plane labeled.
- Now the image with the label is shown.
|
|
|
 and Zoom Out icons.
 the image is saved in the downloads folder.
 .
.