| USER MANUAL | Date: april 12 de 2015 | |
| ||
 |
||
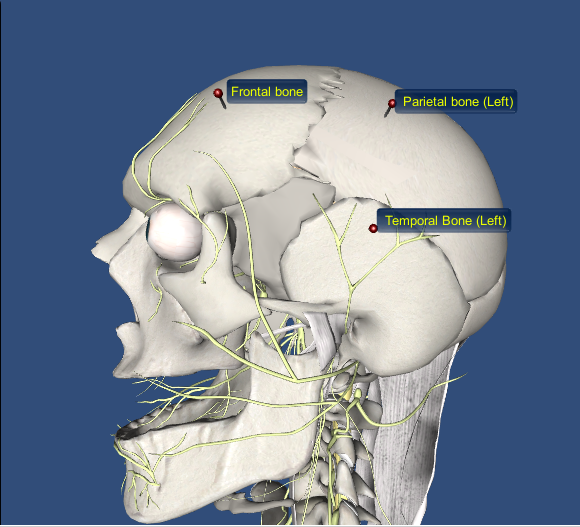
Create, edit and save PINS
| ||
| ||
 |
||
|
The folowing actions are available now:
| ||

|
Labels: Show or hide Label created. | |
 |
Normal status: To exit Edit Pins mode | |
 |
Add PIN: Adds a PIN in the location of the model where the user click |
|
 |
Edit PIN: Let the user change the name of an already created Pin when Click on it. |
|
 |
Delete PIN: Deketes a Pin when the user click over a Pin |
|
|
||
| ||
| ||
|
||
|
||
 return to main menu return to main menu |
||
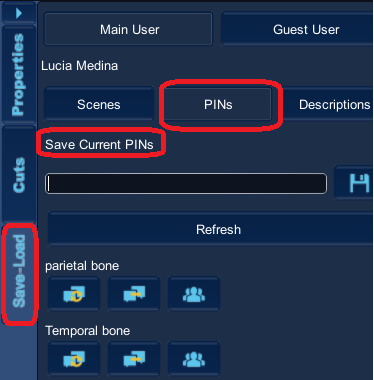
Saving PINSYou can save the Pins to be viewed or shared later.NOTE : To save your pins with the scene created , you must save through the Save a Scene. Once you have finished creating the PINES click the tab Save-Load and click the icon Pines |
||
| Once you have finished creating the Pins click the Save-Load tab click on the icon Pins | ||
 |
||
|
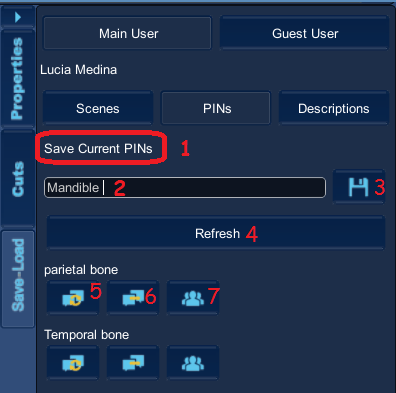
The popup window switches to the next menu, follow these simple steps to save the pins you created :
|
||
| This window offers additional functions : |
||
4.Refresh : Updates the list of pins created
5. Load : Click
 to retrieve saved PINS . The Pines will be displayed in the 3D worksapce. to retrieve saved PINS . The Pines will be displayed in the 3D worksapce.
6. Delete: Deletes Pins from the list by clicking

7.
The Pins are private, that is, accessible only who creates them.
However you can share with your community by clicking on the icon
 |  | |
| return to main menu |
||
Share Pins (Only Web version) | ||
By default, when you create Pines they are private. If you want to share with other users of BioTK ®, click on the icon  the icon should have turned into indicating that pins are already public . the icon should have turned into indicating that pins are already public . If you want to make them private again click on the icon  | ||
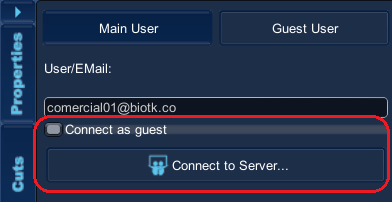
Loading Pins shared by other users ( Web Version Only )
|
||
| ||
 | ||
| ||
 | ||
| ||
| ||
| NOTE : To save a scene with Pines, must do so through the save scenes. |
||
| return to main menu |
||
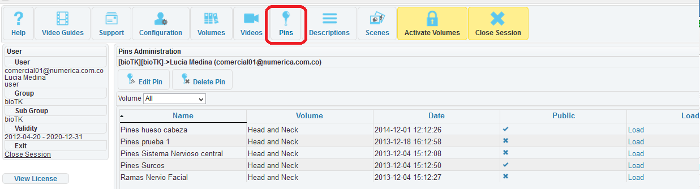
Check the list of Pins ( Only on the web version )
|
||
| ||
 | ||
| return to main menu |
||
| Copyright Numérica Ltda, all rights reserved. www.numerica.com.co | ||

 or hot enter. The pins just save appear on bottom of the list.
 . A warning that the PINES loaded appears. .